
I love Spring for all the usual reasons: flowers, sunshine, half price chocolate after Easter. But as a DIY junkie, the thing I love most of all about Spring is that it’s furniture painting season! Now if you live in a warm climate or have a temperature controlled work space, you won’t understand this. But if you live in small apartment in a city wheres it’s cold 6 months of the year, you know there’s a small time frame every year where you can leave all the windows open all day and tackle all those DIY painting projects you’ve been eyeballing all winter long. And it’s finally here!
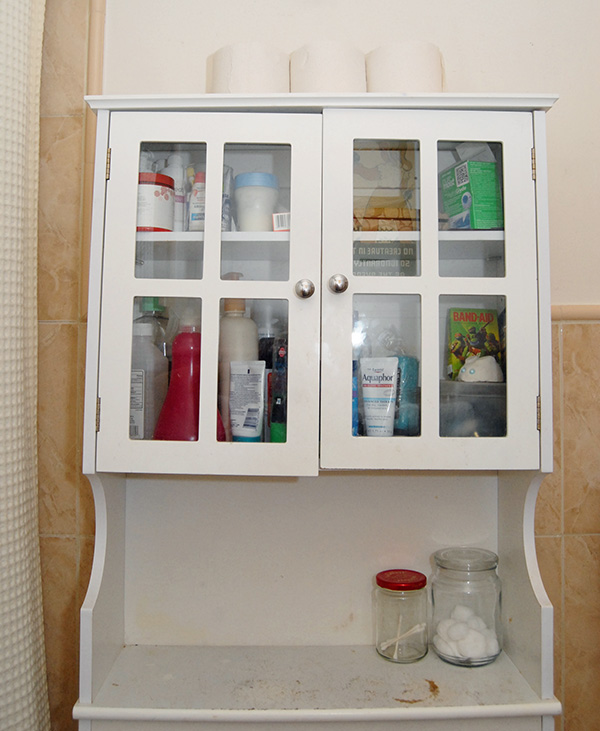
So my first project this spring was to paint this truly hideous (but functional and needed) bathroom cabinet. Truthfully, the whole bathroom is a decor disaster, but you have to start somewhere.
I did much googling and searching on Pinterest (like here and here) to come up with the best way to paint this. It is going to live next to the shower, after all. Most people recommend using oil based primer, but since I’m painting in a small apartment with not much of a cross-breeze, I ruled that out. A little more searching led me to this stuff:
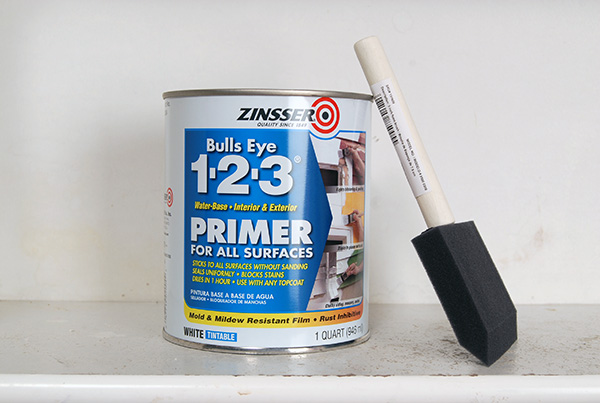 Water based AND no sanding! As the adorable girl at Home Depot said to me “I ask people- Do you want to sand or do you not want to sand?” Who wants to sand? Not me. Sold.
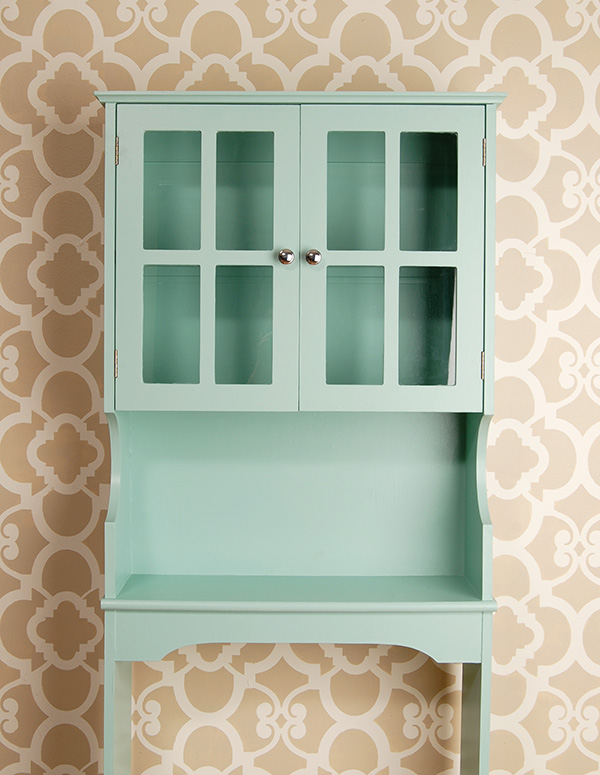
I picked a blue green color called Spring Stream by Behr in semigloss to coordinate with the peach (yes,peach) tiles in the bathroom. I’m hoping the bright color with cause them to fade into the background a bit. We’ll see.
I decided against using a top coat since I didn’t want to stink up the apartment. But if I had a well ventilated space, I would put a clear poly-acrylic on top of the paint to protect it, like I did with my kitchen chairs. I’ll see how it holds up without it and update this post to let you know.
supplies:
- Zinsser Bull’s Eye 1-2-3 primer
- latex paint
- paint brushes
- small paint roller
- paint tray
- drop cloth
- painting tape and newspaper
- exact-o knife (optional)
Give your cabinet a good cleaning and wipe down to get rid of any dust and grime and let dry. Remove the doors and take the hinges off and put aside. Take out inner shelf and remove shelf support pegs. Take off cabinet knobs. My cabinet has a bottom crossbar for stability. I took that off too to paint separately. Tape and paper the glass to protect it from paint.
TIP: Be really meticulous about taping. It’s always the edges that show imperfections, and if you’re like me, it’s the first thing your eye sees every time you look at it. So make sure your tape is straight and not covering any place that needs painting.
Lay down your drop cloth spread your pieces out to prime. I propped my doors and 2 wood pieces on old take out containers so they didn’t stick to the drop cloth.
Do 2 thin coats of primer, letting each dry for an hour. Now do coats of paint, again letting each dry an hour. Use a brush for the edges, and the paint roller on the the big areas to minimize brush strokes. Check for drips between each coat.
Remove tape and newspaper from the glass on the doors. Use the exact-o knife to clean up any stray paint or uneven edges. (You can skip this part, but I found it really makes a difference in how polished the cabinet looks when finished). Re-attach shelf, doors and crossbar. Done.

So much better. Now to just find some cuter knobs, and maybe do something about the clear glass, so you can’t see all the goop.
When I don’t want to prep for painting, I add plaster of Paris to the paint. It creates chalk paint and covers just about anything (I did my front metal door). Also, if you remove the glass you could either cover it with lace (even spray paint using lace as a stencil) or etch it, and put it back on. That way you wouldn’t see through. You could also tint diluted Elmer’s/craft glue (1/2 glue 1/2 water) with food coloring and paint with a roller to tint your glass to match your decor. Lovely job on your bathroom cabinet!
It looks amazing! I had no idea you could paint laminate furniture.